F-84e Progress
27 - April - 2013 - 20:25
Hey there! It's been ages, I know, but I'm back with an update on my progress on the F-84e. Since the last update, lots of other exciting non-model-related things have happened, such as me finishing work on Monsters University (in theaters June 21st!), some vacation, and misc other tasks. But recently, I decided to quit slacking around and try to make some real progress on this model. Here's what I have been up to…
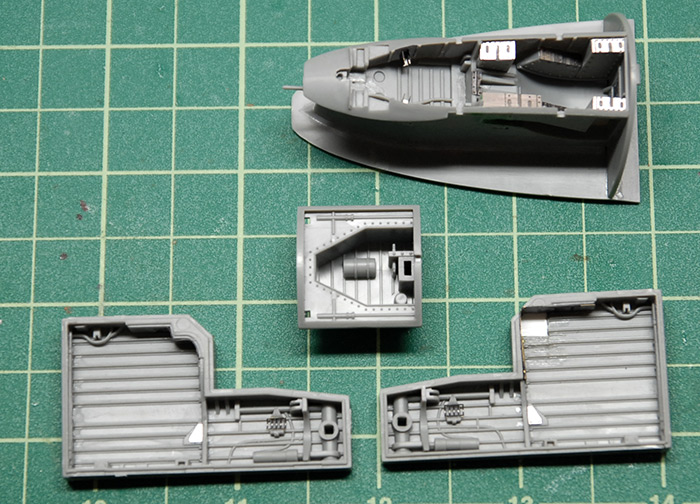
After the cockpit, the next step was the landing gear and air brake bays. The detail kit from Eduard included various panels and brackets for these, so you can see a few of those in the images below. The Eduard instructions also called for me to cut one of the corners out of one rear gear bay and replace it with an etch panel (lower right, in the below photo). This was questionably successful, as the part that I was supposed to replace the floor corner with didn't fit very well and the thickness between the plastic floor parts and the etch version just weren't close enough to blend together. I decided to just let it slide and replaced the etch floor with some polystyrene card and leave it at that.
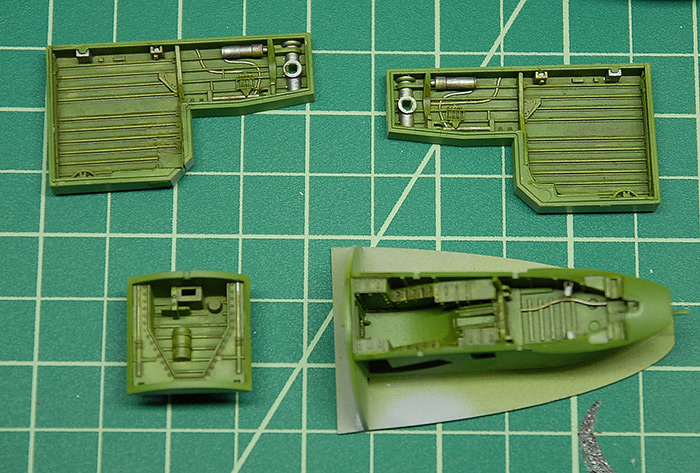
Below you can see the same bays after priming and painting in a base green. They had various details picked out by hand in steel paint, the raised bits picked out with a lighter shade via dry brushing and the whole things hit with a grungy brown wash to give it all a bit of dirt.
Next up was prepping the fuselage halves for assembly. Since the front gear bay, air brake bay and cockpit are all locked between the halved when they go together, the inside of the fuselage halves need to be painted to match where appropriate. As you can see in the image below, most of it was painted the same green as the cockpit. The metallic bit at the front is the area that is seen through the nose intake, which, according to reference photos, matches the exterior aluminum color.
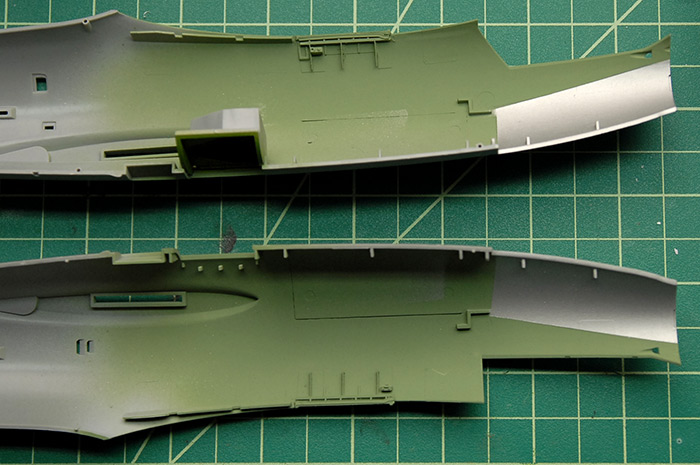
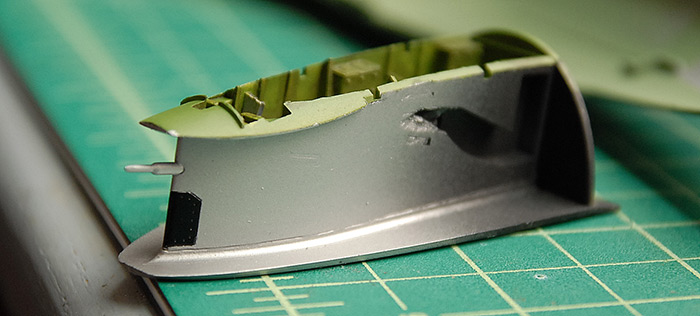
Similarly, the front landing gear bay had to have the upper section of it painted that same aluminum, since it goes in that same intake, and splits the flow of air. I'm not sure what the little black panel is, but all the reference I could find showed it being black and shiny, so there you have it.
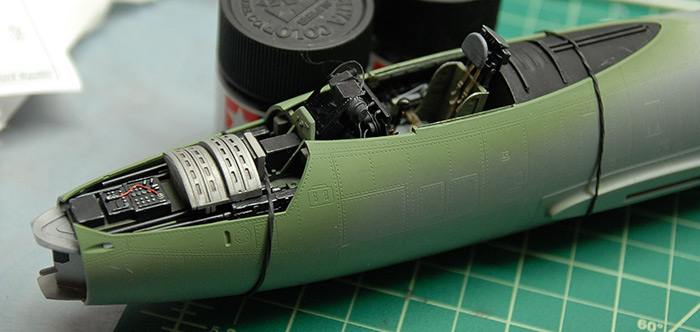
Below you can see the fuselage halves in place, while the glue is drying, with the cockpit sandwiched in between.
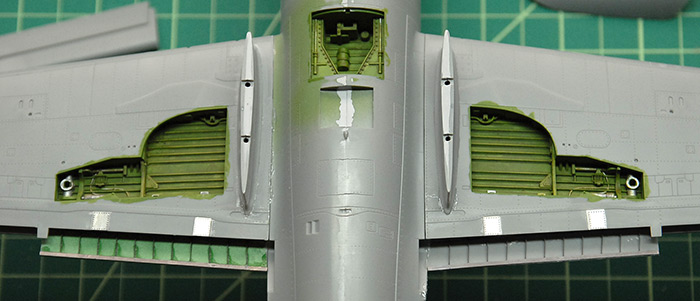
Skipping ahead a bit, the next step was to assemble the wings, which sandwich the rear gear bays in them. This was another area where the Eduard detail kit had a few extras for me to add. The place where the flaps go had an extra photo-etch piece, which showed a bit of the structure of the wing itself. These were a little tricky, as it required that a little bit of the wing be cut away to make room for the flap connections (which were also replaced by etch parts). You can see in the photo below that the two sides are different colors, as I first tried filling in the gaps with super glue, on the right side, and then, not being happy with that (but also not willing to take it back apart) I took a different approach on the left side and filled the area in with green putty. The putty was then sanded back into a flat surface which fit the etch part a little better. While neither side is perfect, I'm hoping that the imperfections are mostly covered by the flaps, once they are in place.
Also visible below is a bit of the filling that was added between the fuselage halves to help cover up the seam.
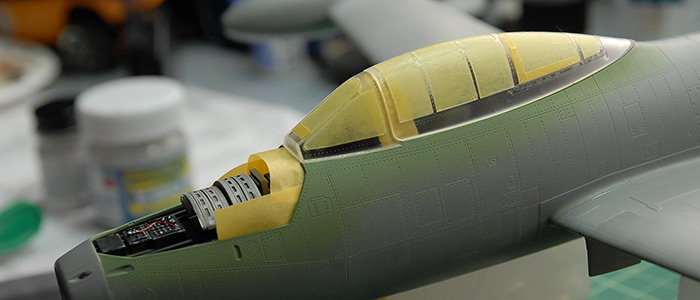
Next up was to mask the canopy parts, using the precut masks that came with the Eduard kit. Generally, they fit well, but were tricky to place in a few cases. You can see below where I ended up just adding a little bit of extra tape, because it was giving me too much trouble getting the mask into just the right place. Also, this is where I ran into a bit of a snag. I discovered that, with all the cockpit stuff in place, the front canopy section wouldn't actually fit over it.
Whoops!
The HUD glass was sticking up a bit too far to allow the canopy to fit into its spot. What I ended up doing was detaching a few of the parts that held the HUD and then shortened a few of them, so that, once back in place, they were low enough to allow the canopy to fit. A side note here: I found that the clear HUD piece that came with the kit seemed strangely large. If I were to go back and do it again, I'd probably make a new piece that was quite a bit smaller and substitute that instead. But, by the time I got far enough along and realized that its scale didn't really match the reference photos I had, I really wasn't up for tearing it apart again and building something new. Oh well :)
The rear canopy section is taped in place on the front and held in the back with a tiny dab of clear-parts glue, with the thought that it'll be easy to pop back off after painting.
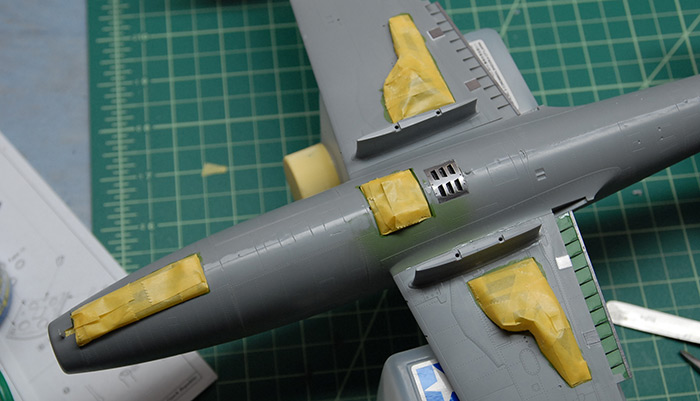
Below you can see the various gear bays masked off and ready for priming and painting.
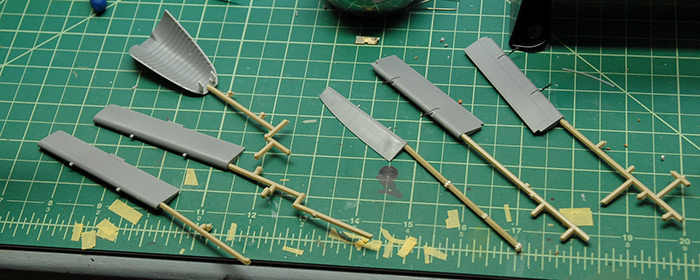
The various flaps and such with the standard scrap-sprue handles, also ready for priming and painting.
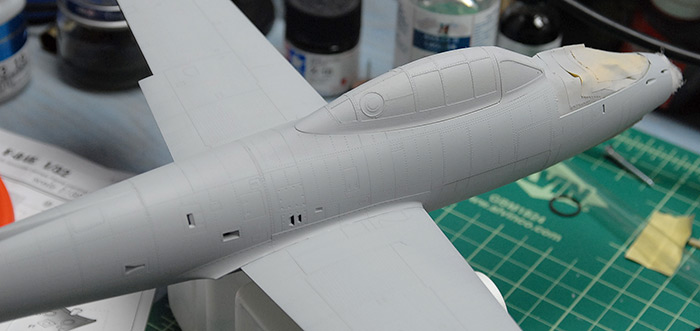
The model after priming with Mr Surfacer 1200:
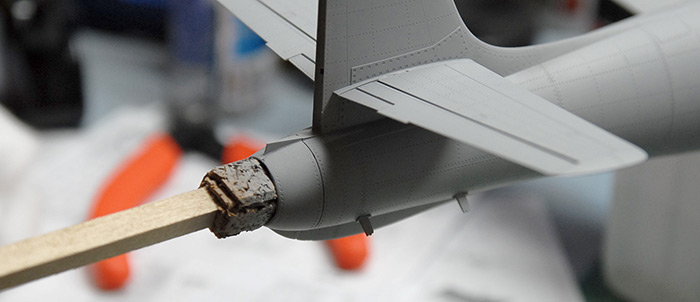
I made myself a little handle out of some scrap bass wood I had around and some self-adhesive cork sheeting I had left over from when I lined my desk drawers. I'm pretty sure I may have snapped off a few of the etch parts inside the exhaust, but I'll fix those later ;)
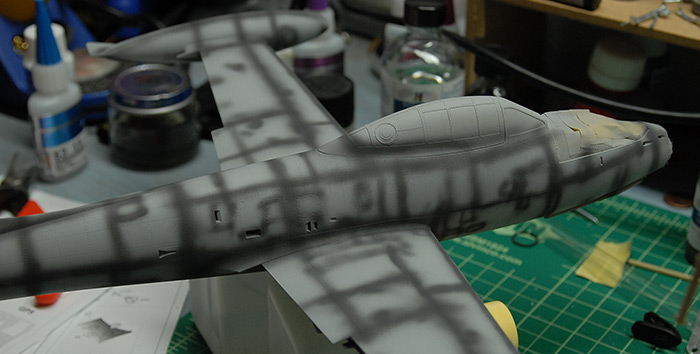
Next up was some pre-shading on the panel lines with some Tamiya German Grey. The idea here is to just give some contrasting tones that can subtly show through the metallic paint later on. This helps break up the otherwise flat surface and hints at wear and tear.
Next up was a base coat of Alcald Aluminum paint. Then various panels were masked off and painted with a darker aluminum shade. Then more panels were masked and painted with a lighter aluminum shade. Next, the top of the canopy was masked and painted flat white. Finally, the top of the fuselage was masked and painted olive drab.
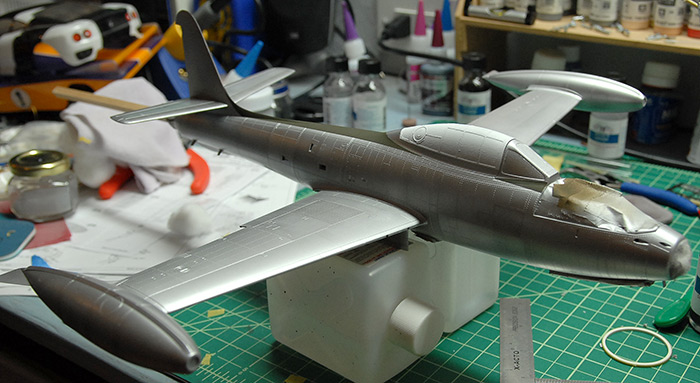
In the below photo, it is a little easier to see some of the variation in the panel shades. These will be picked out a bit more later on with weathering and pin washing.
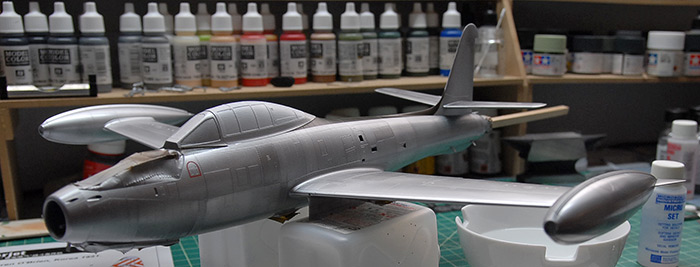
Next up were two coats of Pledge Future, to prep for decals. For those not familiar with this stuff, it is a floor care product that is widely used by modelers since it has a number of features that make it great to work with. First off, it can be airbrushed directly, without any diluting (very handy). It provides a nice glossy surface, to help prevent silvering (this is the reason to want a gloss coat at this point) with the decals and also lays nice and flat after drying, so you don't have to worry about it adding a ton of thickness or filling in fine panel seams. Also, it is an acrylic product, so I can put it right over the fragile Alclad paint and not have to worry about the solvents eating away the paint. It also smells nice :)
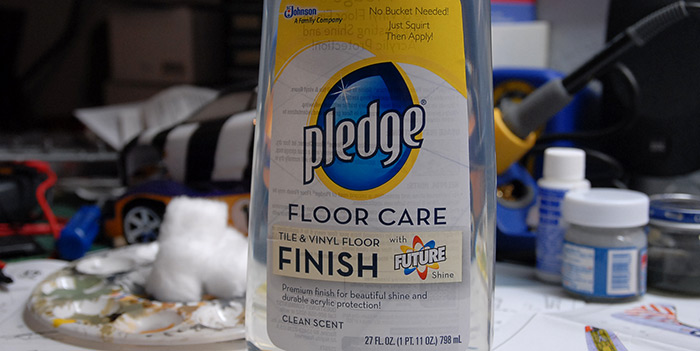
Since it's no longer called 'Future', I figured I'd add an image of what my bottle looks like, so that others wanting to use the same had an easier time tracking it down (it can be ordered from amazon.com).
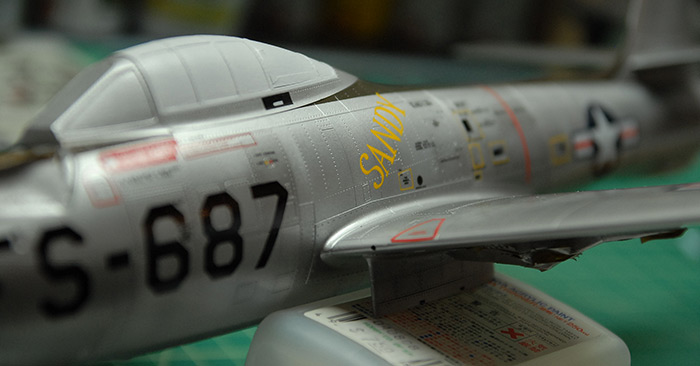
And finally, here's a little teaser of the in-progress decal work. At this time, I've got one side pretty much complete decal-wise and am moving on to the other side.
Once the decals are all on, then it's back to the landing gear, in order to give this bird some legs to stand on. Then comes an overcoating of flat clear to kill the gloss from the Future, removal of the canopy masks and then final assembly. I'm still debating how I want to display this one, so I'll leave thoughts on that to a later post.
Thanks for reading!
After the cockpit, the next step was the landing gear and air brake bays. The detail kit from Eduard included various panels and brackets for these, so you can see a few of those in the images below. The Eduard instructions also called for me to cut one of the corners out of one rear gear bay and replace it with an etch panel (lower right, in the below photo). This was questionably successful, as the part that I was supposed to replace the floor corner with didn't fit very well and the thickness between the plastic floor parts and the etch version just weren't close enough to blend together. I decided to just let it slide and replaced the etch floor with some polystyrene card and leave it at that.

Below you can see the same bays after priming and painting in a base green. They had various details picked out by hand in steel paint, the raised bits picked out with a lighter shade via dry brushing and the whole things hit with a grungy brown wash to give it all a bit of dirt.

Next up was prepping the fuselage halves for assembly. Since the front gear bay, air brake bay and cockpit are all locked between the halved when they go together, the inside of the fuselage halves need to be painted to match where appropriate. As you can see in the image below, most of it was painted the same green as the cockpit. The metallic bit at the front is the area that is seen through the nose intake, which, according to reference photos, matches the exterior aluminum color.

Similarly, the front landing gear bay had to have the upper section of it painted that same aluminum, since it goes in that same intake, and splits the flow of air. I'm not sure what the little black panel is, but all the reference I could find showed it being black and shiny, so there you have it.

Below you can see the fuselage halves in place, while the glue is drying, with the cockpit sandwiched in between.

Skipping ahead a bit, the next step was to assemble the wings, which sandwich the rear gear bays in them. This was another area where the Eduard detail kit had a few extras for me to add. The place where the flaps go had an extra photo-etch piece, which showed a bit of the structure of the wing itself. These were a little tricky, as it required that a little bit of the wing be cut away to make room for the flap connections (which were also replaced by etch parts). You can see in the photo below that the two sides are different colors, as I first tried filling in the gaps with super glue, on the right side, and then, not being happy with that (but also not willing to take it back apart) I took a different approach on the left side and filled the area in with green putty. The putty was then sanded back into a flat surface which fit the etch part a little better. While neither side is perfect, I'm hoping that the imperfections are mostly covered by the flaps, once they are in place.
Also visible below is a bit of the filling that was added between the fuselage halves to help cover up the seam.

Next up was to mask the canopy parts, using the precut masks that came with the Eduard kit. Generally, they fit well, but were tricky to place in a few cases. You can see below where I ended up just adding a little bit of extra tape, because it was giving me too much trouble getting the mask into just the right place. Also, this is where I ran into a bit of a snag. I discovered that, with all the cockpit stuff in place, the front canopy section wouldn't actually fit over it.
Whoops!
The HUD glass was sticking up a bit too far to allow the canopy to fit into its spot. What I ended up doing was detaching a few of the parts that held the HUD and then shortened a few of them, so that, once back in place, they were low enough to allow the canopy to fit. A side note here: I found that the clear HUD piece that came with the kit seemed strangely large. If I were to go back and do it again, I'd probably make a new piece that was quite a bit smaller and substitute that instead. But, by the time I got far enough along and realized that its scale didn't really match the reference photos I had, I really wasn't up for tearing it apart again and building something new. Oh well :)
The rear canopy section is taped in place on the front and held in the back with a tiny dab of clear-parts glue, with the thought that it'll be easy to pop back off after painting.

Below you can see the various gear bays masked off and ready for priming and painting.

The various flaps and such with the standard scrap-sprue handles, also ready for priming and painting.

The model after priming with Mr Surfacer 1200:

I made myself a little handle out of some scrap bass wood I had around and some self-adhesive cork sheeting I had left over from when I lined my desk drawers. I'm pretty sure I may have snapped off a few of the etch parts inside the exhaust, but I'll fix those later ;)

Next up was some pre-shading on the panel lines with some Tamiya German Grey. The idea here is to just give some contrasting tones that can subtly show through the metallic paint later on. This helps break up the otherwise flat surface and hints at wear and tear.

Next up was a base coat of Alcald Aluminum paint. Then various panels were masked off and painted with a darker aluminum shade. Then more panels were masked and painted with a lighter aluminum shade. Next, the top of the canopy was masked and painted flat white. Finally, the top of the fuselage was masked and painted olive drab.

In the below photo, it is a little easier to see some of the variation in the panel shades. These will be picked out a bit more later on with weathering and pin washing.

Next up were two coats of Pledge Future, to prep for decals. For those not familiar with this stuff, it is a floor care product that is widely used by modelers since it has a number of features that make it great to work with. First off, it can be airbrushed directly, without any diluting (very handy). It provides a nice glossy surface, to help prevent silvering (this is the reason to want a gloss coat at this point) with the decals and also lays nice and flat after drying, so you don't have to worry about it adding a ton of thickness or filling in fine panel seams. Also, it is an acrylic product, so I can put it right over the fragile Alclad paint and not have to worry about the solvents eating away the paint. It also smells nice :)
Since it's no longer called 'Future', I figured I'd add an image of what my bottle looks like, so that others wanting to use the same had an easier time tracking it down (it can be ordered from amazon.com).

And finally, here's a little teaser of the in-progress decal work. At this time, I've got one side pretty much complete decal-wise and am moving on to the other side.

Once the decals are all on, then it's back to the landing gear, in order to give this bird some legs to stand on. Then comes an overcoating of flat clear to kill the gloss from the Future, removal of the canopy masks and then final assembly. I'm still debating how I want to display this one, so I'll leave thoughts on that to a later post.
Thanks for reading!
blog comments powered by Disqus
