Hornethopter Continued
09 - September - 2012 - 20:00
I should never have claimed that the build was moving quickly and wouldn't take very long, as that pretty much ensured that it would grind to a halt almost instantly.
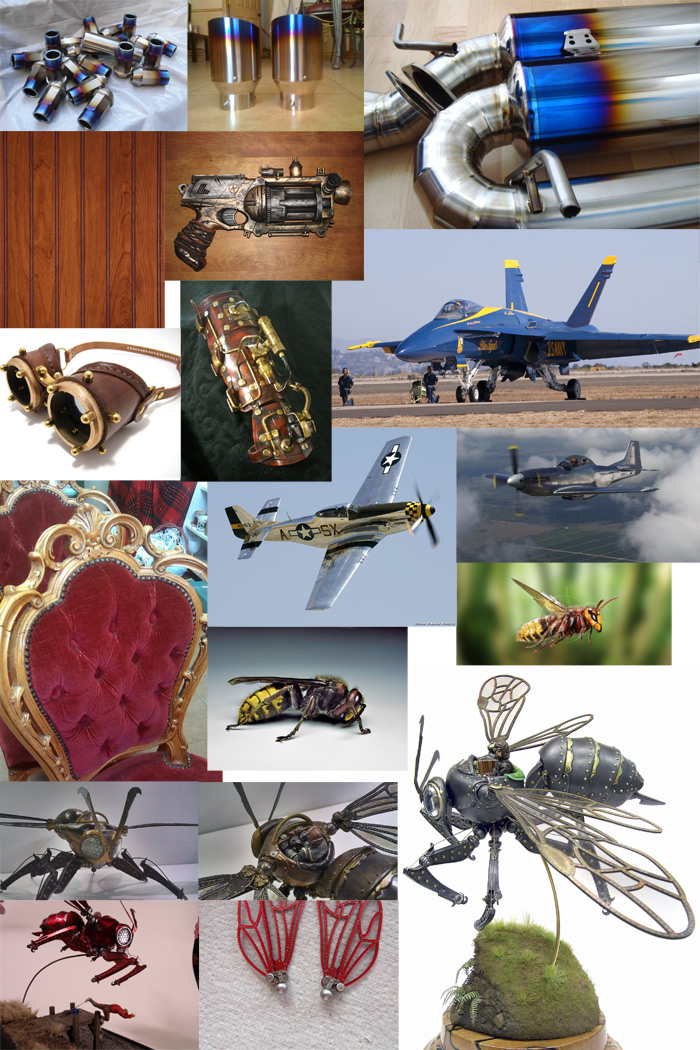
So, the problem that I had with this one was that I didn't have a clear idea of exactly how I was going to paint and mount it. I hit the point where I needed to start assembly and drilling/pinning parts together, but I didn't have a mental picture of how the legs should be posed. After stewing on it for a few weeks I finally just started searching the interwebs for inspiration. I really liked the ideas of having some of the parts look like heat-treated titanium. I also wanted to embrace some of the kits steam punk look while also incorporating some modern military cues and some elements from real wasps. At the same time I did't want to repeat what I had already seen online, but I wanted to draw some inspiration from good looking models that others had built.
With all that in mind, I collected images, put them all together into a 13" x 19" format and printed myself out a big ol inspiration sheet. Below is the fun-sized internet version. Please note that this is a collection of other peoples photos, so the copyrights generally belong to them, so hopefully they won't sue me or anything ;)
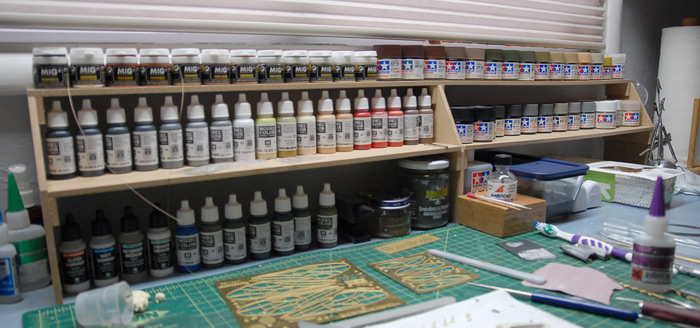
Also, I have recently purchased quite a few new paints (mentioned in a previous post), but didn't really have a good way to organize them. I was finding that these taller skinny bottle were just lurking about my model desk in a group, often falling over, and generally being difficult to deal with. It was hard to quickly find the color that I wanted and it was easy to bump them so they all fell over. After a bit of consideration, I decided it was time to build a new little paint shelf, better suited to my new model desk and the differently-sized bottles. On my way home from work, I swung by Home Depot, picked up a $5 sheet of 1/4" thick MDF board and got to work. I settled on a shelf that was about 4ft long and about 7.5" tall, and 4" deep. I just sketched it out quickly, marked the board and cut out a bunch of pieces. I then realized I had cut the slot in two of the upright parts in the wrong place and called it a day ;)
The next day, I cut two new parts and glued the whole thing together. Below you can see the end result, putting most of my paints and pigments within arms reach.
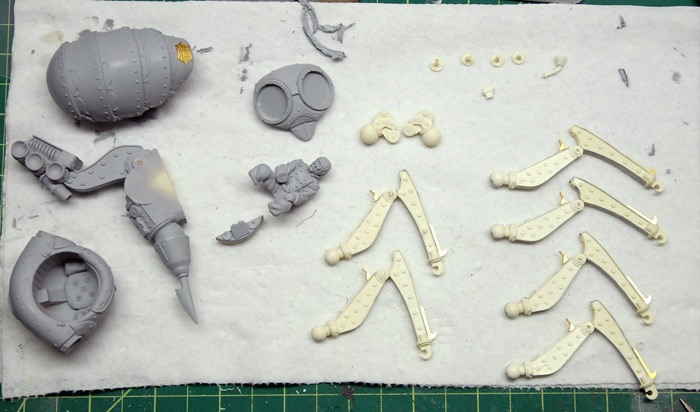
With some inspiration gained, and the model desk freshly organized, I began gluing things together. Below you can see the legs put together. I glued the upper and lower sections together first and then drilled through the joint with a pin vice and glued some brass rod into the hole in order to strengthen the joint. The leg pose that I decided on was one that hopefully mimics the legs of a real hornet, when in flight. The image above of the flying hornet is what I was aiming for. While I can't hit the pose exactly, since the kit legs can't fold up against the body quite that far, I'm hoping that the general feel will be similar.
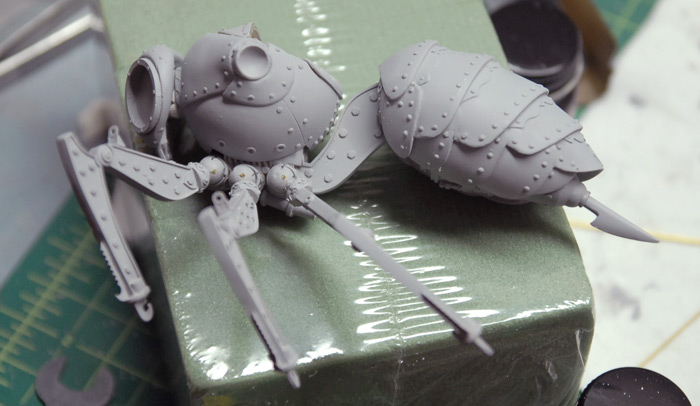
With a coat of primer sprayed onto these parts, I began the rough assembly. This consisted of marking, taping and sticking (with museum tack) the various parts together, so that I could drill holes and glue in brass pins where needed. The legs, for example, were posed and then held by one hand, while the other hand used the Dremel (with the flexi-wand attachment thing), fitted with a tiny drill bit, to drill through the ball joint into the body. Then, I could fit an appropriately-sized length of brass rod through this hole. I glued the rod just to the leg, making it so I could take the whole thing apart, but once painting is done, it can be easily reassembled just as intended. Below you can see the first three legs pinned in place.
Once I had all the pins installed in the legs, I prepped all of the sprayable parts for painting by attaching various handles to them.
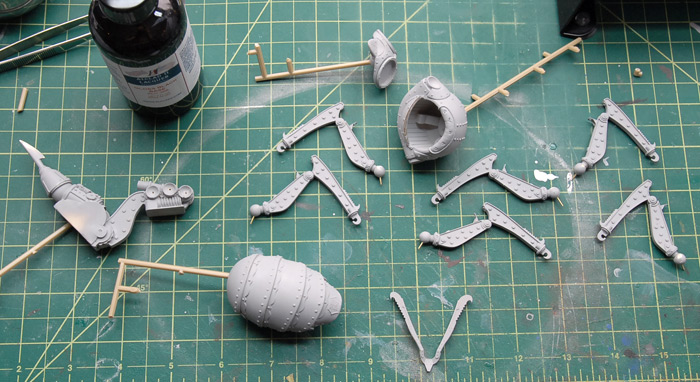
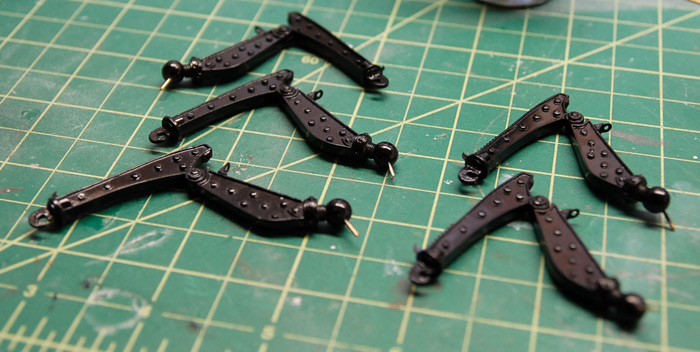
As I alluded to earlier, I decided to go with a metal finish for most of the model. I decided to use Alclad lacquer on this model, which is not something I have tried before. For the finishes I am using, it is a two step process. First, a gloss black paint is sprayed over the parts, and then, after drying for a day, the metallic paint is lightly sprayed over the black. Below you can see the legs with their gloss black coat.
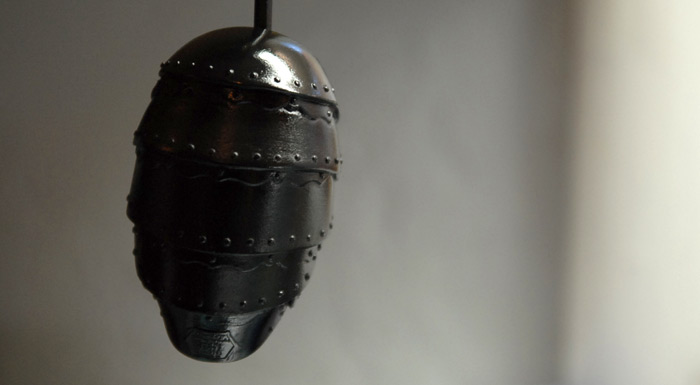
The abdomen with its gloss black:
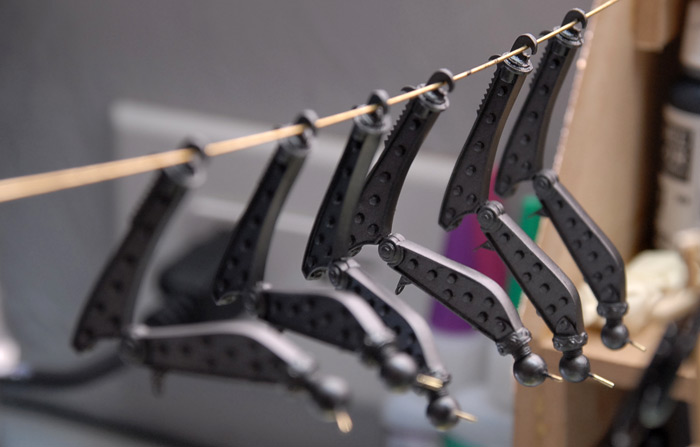
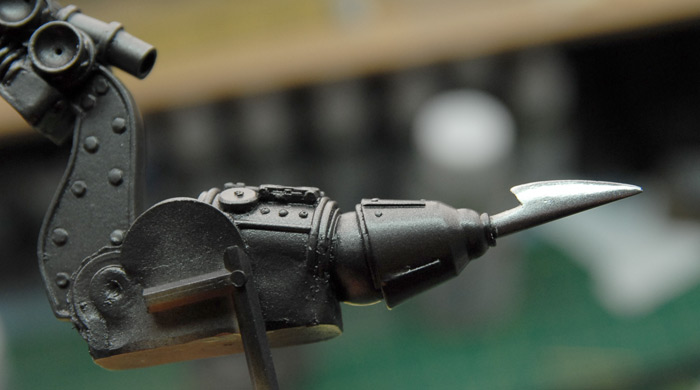
For the legs and connecting frame, I used Alclad Steel paint, which is a darker, semi-gloss finish. Below you can see the legs hanging to dry.
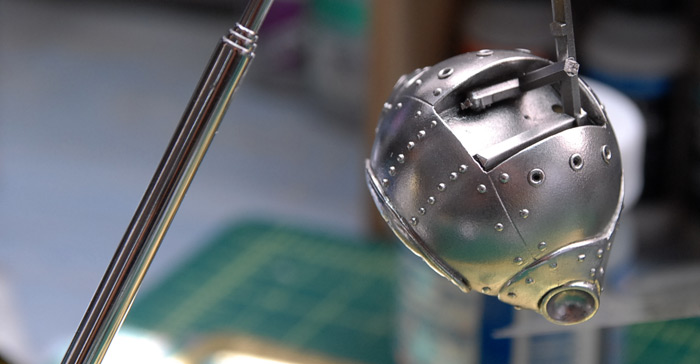
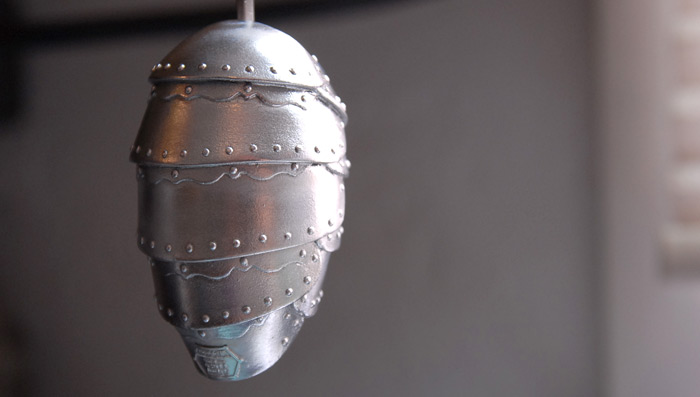
The rest of the parts were painted with Alclad Chrome. This is a nice bright, high-gloss paint, although a bit trickier to apply well than the steel color was. The plans is to get these parts nice and bright and then go back over them with a few colors of clear yellow, red and blue paint, hopefully getting the rainbow looks of heat treated titanium. Depending on how that turns out, I may then dull it all down a bit with some weathering and dirt, but I'll play that by ear.
Below is the thorax drying.
And the abdomen after its chrome treatment. This one ended up with a few duller areas, and may need another coat to even it out.
Below you can see the main connecting structure painted in steel, with the stinger painted chrome.
That's where I am as of this evening. Next up is a bit of repainting on the abdomen and then a shot at the multi-color clear treatment. Also, as soon as the cockpit section is done with airbrushing, I can begin hand painting the wood and seat in there as well as the pilot and control panel.
So, the problem that I had with this one was that I didn't have a clear idea of exactly how I was going to paint and mount it. I hit the point where I needed to start assembly and drilling/pinning parts together, but I didn't have a mental picture of how the legs should be posed. After stewing on it for a few weeks I finally just started searching the interwebs for inspiration. I really liked the ideas of having some of the parts look like heat-treated titanium. I also wanted to embrace some of the kits steam punk look while also incorporating some modern military cues and some elements from real wasps. At the same time I did't want to repeat what I had already seen online, but I wanted to draw some inspiration from good looking models that others had built.
With all that in mind, I collected images, put them all together into a 13" x 19" format and printed myself out a big ol inspiration sheet. Below is the fun-sized internet version. Please note that this is a collection of other peoples photos, so the copyrights generally belong to them, so hopefully they won't sue me or anything ;)

Also, I have recently purchased quite a few new paints (mentioned in a previous post), but didn't really have a good way to organize them. I was finding that these taller skinny bottle were just lurking about my model desk in a group, often falling over, and generally being difficult to deal with. It was hard to quickly find the color that I wanted and it was easy to bump them so they all fell over. After a bit of consideration, I decided it was time to build a new little paint shelf, better suited to my new model desk and the differently-sized bottles. On my way home from work, I swung by Home Depot, picked up a $5 sheet of 1/4" thick MDF board and got to work. I settled on a shelf that was about 4ft long and about 7.5" tall, and 4" deep. I just sketched it out quickly, marked the board and cut out a bunch of pieces. I then realized I had cut the slot in two of the upright parts in the wrong place and called it a day ;)
The next day, I cut two new parts and glued the whole thing together. Below you can see the end result, putting most of my paints and pigments within arms reach.

With some inspiration gained, and the model desk freshly organized, I began gluing things together. Below you can see the legs put together. I glued the upper and lower sections together first and then drilled through the joint with a pin vice and glued some brass rod into the hole in order to strengthen the joint. The leg pose that I decided on was one that hopefully mimics the legs of a real hornet, when in flight. The image above of the flying hornet is what I was aiming for. While I can't hit the pose exactly, since the kit legs can't fold up against the body quite that far, I'm hoping that the general feel will be similar.

With a coat of primer sprayed onto these parts, I began the rough assembly. This consisted of marking, taping and sticking (with museum tack) the various parts together, so that I could drill holes and glue in brass pins where needed. The legs, for example, were posed and then held by one hand, while the other hand used the Dremel (with the flexi-wand attachment thing), fitted with a tiny drill bit, to drill through the ball joint into the body. Then, I could fit an appropriately-sized length of brass rod through this hole. I glued the rod just to the leg, making it so I could take the whole thing apart, but once painting is done, it can be easily reassembled just as intended. Below you can see the first three legs pinned in place.

Once I had all the pins installed in the legs, I prepped all of the sprayable parts for painting by attaching various handles to them.

As I alluded to earlier, I decided to go with a metal finish for most of the model. I decided to use Alclad lacquer on this model, which is not something I have tried before. For the finishes I am using, it is a two step process. First, a gloss black paint is sprayed over the parts, and then, after drying for a day, the metallic paint is lightly sprayed over the black. Below you can see the legs with their gloss black coat.

The abdomen with its gloss black:

For the legs and connecting frame, I used Alclad Steel paint, which is a darker, semi-gloss finish. Below you can see the legs hanging to dry.

The rest of the parts were painted with Alclad Chrome. This is a nice bright, high-gloss paint, although a bit trickier to apply well than the steel color was. The plans is to get these parts nice and bright and then go back over them with a few colors of clear yellow, red and blue paint, hopefully getting the rainbow looks of heat treated titanium. Depending on how that turns out, I may then dull it all down a bit with some weathering and dirt, but I'll play that by ear.
Below is the thorax drying.

And the abdomen after its chrome treatment. This one ended up with a few duller areas, and may need another coat to even it out.

Below you can see the main connecting structure painted in steel, with the stinger painted chrome.

That's where I am as of this evening. Next up is a bit of repainting on the abdomen and then a shot at the multi-color clear treatment. Also, as soon as the cockpit section is done with airbrushing, I can begin hand painting the wood and seat in there as well as the pilot and control panel.
blog comments powered by Disqus
